Tuesday, December 6, 2011

Veyron Deathwing - Inner Frame

Hi guys! It's been a long time since my last post, I recently got hired in a call center and with all the rush of TRYING to make it to GBWC. I wasn't able to reach the deadline so my sincerest apologies to all who were looking forward to my sinanju for the GBWC 2011. Rest assured that I used the time wisely to produce quality outcome. :)

And here is the evidence. I just finished painting the inner frame of the sinanju and I added the metal parts that I've been saving for quite some time now. I still have yet to paint the horns, the wings and the sword. I will need to resupply the metalics I used.

For the Inner Frame I used Mr. metal color stainless, dark iron, chrome silver and gold over a black base coat. I'm really happy with the results and I could almost choose not to put the armor on >:)

So I let the Pictures talk and this is my finest Paint Job yet :)


A closer look on some parts


I cannot tell you guys how excited I am to see this finished. If you're excited I am so much more!!! The inner frame was really fun to paint and I hope I can have as much fun putting decals on the armor (right now the armor is painted I just need to do a little more detailing) and finally the horns, wings and swords

I couldn't stop myself from doing a little bit of posing >>>>>>>:)


I've asked a good friend Stephen Tuazon to help me out installing the LED. I'l leave it off so that you guys can get excited to see the final product. I will be using the same kind of inner frame with my 2012 mecha contest entry.

So that's it guys and I hope you can drop by again when the whole kit is painted to the bone :) 

Friday, October 14, 2011

GBWC 2011 - EA designs Entry - Veyron Deathwing


Alot of you may already know this project of mine from the Apocalypse showdown on MAC forums. This is also my FIRST TIME entry on this years GBWC 2011. Whether I will be able to finish the horse in time for the competition is still uncertain for now I only wish to keep the quality high on the horseman it self.


With his sword


Size Comparison with a 1/144 Zaku - I most probably still have to extend somewhere on the lower leg and the feet 


My Latest Mods

Mods on the backpack - Some people are already cursing me for what I did with the huge wings and backpack, well If you guys thought I was done, you were wrong! I added some more fins to the backpack to adhere to the "spiky and pointy" theme of the kit. I dug up some scrap from my strike noir and aile strike packs and temporarily placed it on the thrusters at the backpack. The results were very satisfying


 Unfortunately I couldn't attach the shotels because it's very hard to pose everything right plus the small feet aren't that stable, so I hope you can make do for what updates I have for now. :)


The strike Noir Fins I added on the backpack overlook the shoulder adding to the original spikes on the shoulder armor, I was surprised how those two pieces increased the impact of the shoulder spikes :)


The Knees
I have this theory that, the most detailed part of most kits are the legs, if you think about it, it was on the legs or knees to be specific that bandai first applied the "shifting" armors, later on it went to the arms and then it went to the other scales, now we have shifting armor even on 1/144 kits :)

I used some parts from my MG deathscythe - the arm guards and the side skirts. I designed them to utilize the shifting Knee armor that the original sinanju leg had. I made use of this to further enhance the detail of the kit, and the outcome didn't disappoint


The shifting Armor - Pictures show from step 1 to step 3 :)


Amazing isn't it?? It amazes me even though I built it :))

Well that's all of the updates I have right now I may make more blog posts about the previous progress on this kit so that others who will visit my blog maybe able to view the "transformation" this kit underwent :)
I'll be doing some more detailing tonight, hopefully when the sun is up tomorrow I can take good pictures and make another blog post :)


thanks for viewing!

Wednesday, August 31, 2011

An Update to the horse

This is a long overdue Blog post, this picture here has been posted for about a week now at MAC facebook page and is STILL getting "likes". This was the first picture of the horse when I first installed the hind legs. Right now it's supported by my deodorant and the front legs are just standing there freely


A day later, after much thinking I found a way how to attach the front legs to the horse's main body. This is the result. Ever since this picture, Comments have been pouring! From MAC's FB page and the Forum. I guess this is because it is very rare for someone to try out this "CRAZY IDEA" as some put it


It surprised me further that the horse can stand on it's own two feet with some balancing of course.


One more to show the size comparison with the Sinanju. Note that the sinanju will undergo Height mods so that this size comparison is only tentative and will soon change. This is a week old picture and TODAY I am currently working on the torso itself.

see you guys on the next update ^_^

Thursday, July 28, 2011

it's so fluffy~

here's a little something I've been working on, still alot of work to do but I just wanted to post some very early pictures of the design so here goes


the main body


hind legs


fore legs


maybe I could bring this on the MAC anniv :D

Monday, July 18, 2011

EA designs excluseive - MG 00 raiser WIP 1

Worked on this guy today only, for 6 hours straight (not really productive IMO) had to stop because I felt that I wasn't thinking of better mods after about the 5th hour, I had to rest and be ready for fresher mods :) anyway this build is an EA designs exclusive meaning I'll only post this here and not on any other forums (some pics may occasionally slip in my FB account). This is a detail job on the MG 00 raiser as well as touch ups on some of it's flaws and I'm trying to make it accurate with the PG 00 raiser line art. anyway here are the pics
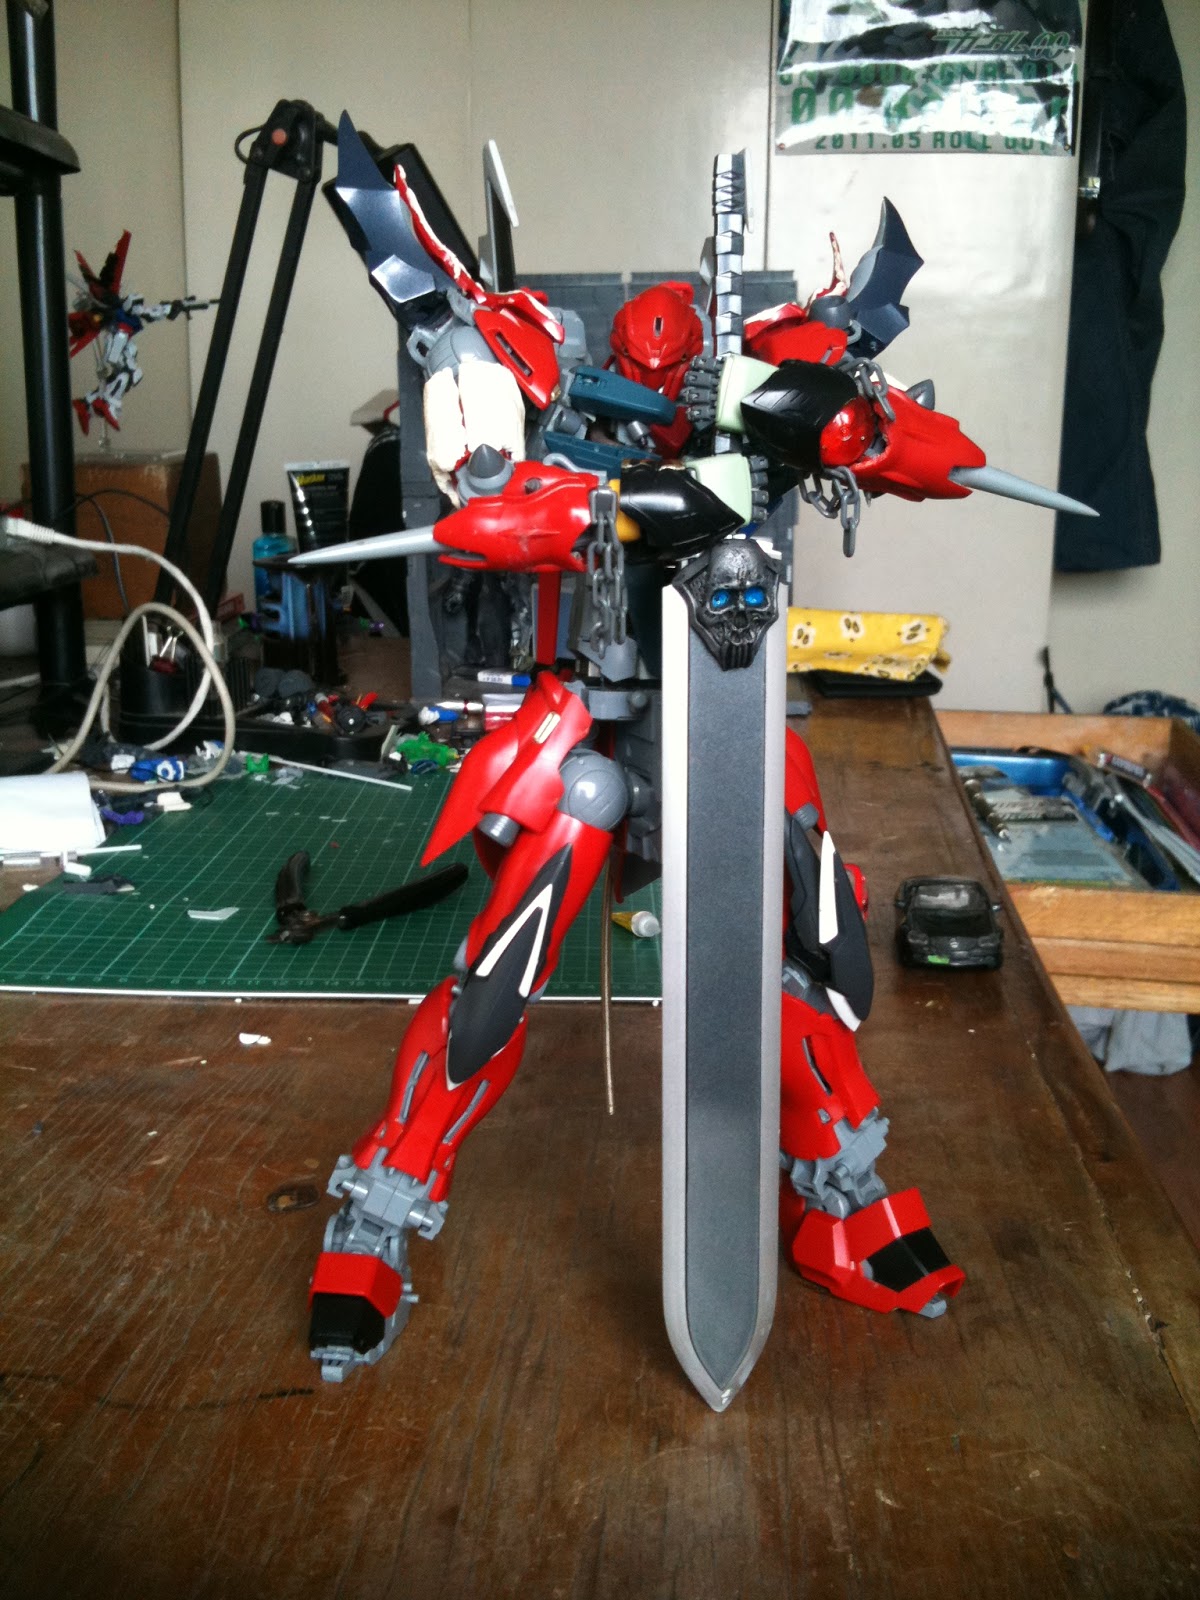
Body shot :D

Started working on the GN drives first, I added some details on the binder holder and the backpack. I also did some cutting on the locking mechanism to increase the swing allowed for better articulation on the wings. Also here I introduce the Koto Combo's (koto part combo) where I combine 2 koto part's for a change in detail. :D

there are 5 koto parts in this picture. including the one on the grey arm holding the GN drive

the added swing, the left side swings higher than the right only the locking mechanisms on the GN drives are used, the locking mechanisms are not used on the backpack. (the ones under the arms)

Next I moved on the arms. I'm really trying to go for accuracy to the PG line art. Quite disappointed really that despite the PG 00r and the metal build 00r the MG 00r wasn't accurate with the PG lineart. really frustrated since the line art looks very COOL. I cut the lower arm armor into 3 pcs and add koto part's near the wrist for some detail 


You may also notice that I added some bulk on the bicep area, I was inspired to do this when I saw my cousin's metal build 00r and the impressions given by the MB and the MG 00r are different, honestly the MB has better proportions (it should! for an 8,000php model). I wanted to copy the muscular biceps of the MB (metal build) I've only done one side of the left arm


just a little cutting to add some details on the shoulder armor


ahhh the torso! well for me the torso of any model kit should be one of the most articulated parts of a kit. if the torso is articulated enough, the kit will be able to do very dynamic poses EVEN if the arms and legs cannot do full bends. One vital joint in the torso is shoulder joint (where you insert the arms and shoulder armor) While the MG 00r does have this joint I find it to be quite limited with some design flaws on the BOXY armor of the MG. thus I had to do some cutting and modding to allow the joint to swing higher up!


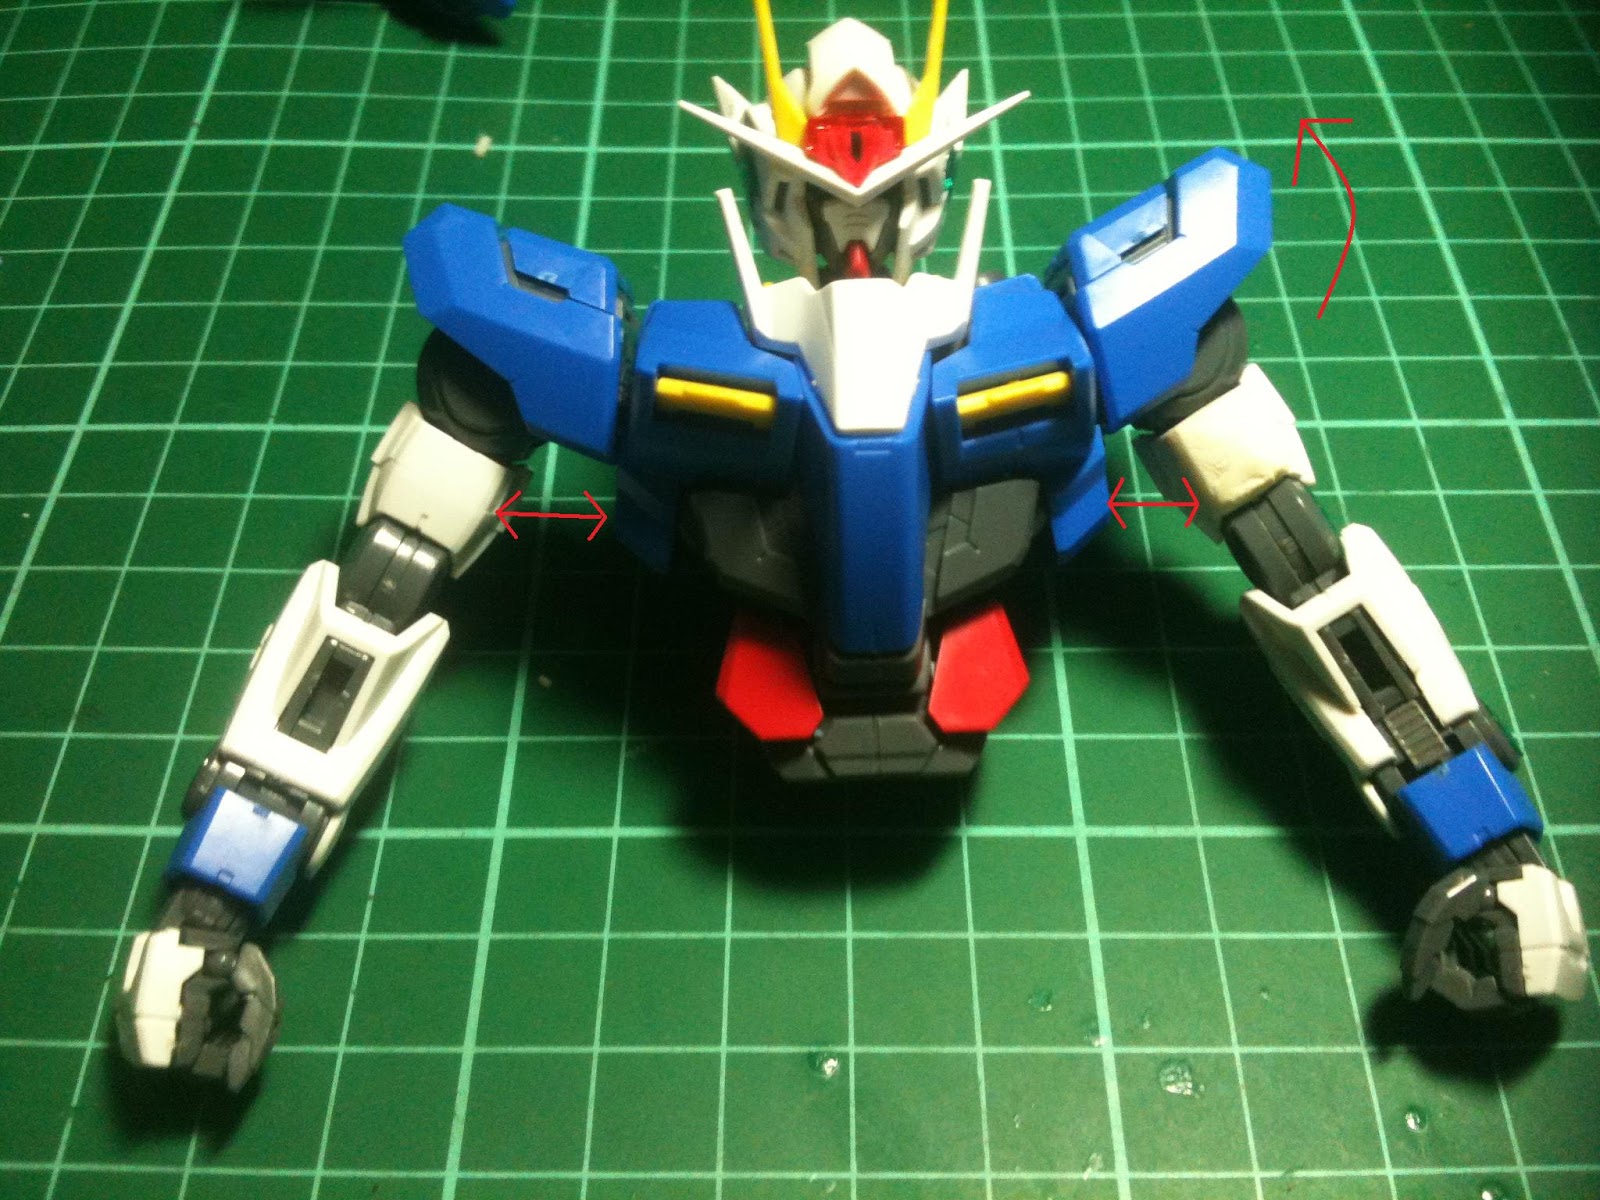
Also something important to note, and also DO (I highly recommend you do this) is that the peg above (in the picture, peg where you insert the arms - left in this case) is rather long, even when you push arms all the way in , the arms will still be to far away from the body. I recommend that you cut them. I've cut my MG freedom's as well as it suffers from the same condition where the arms are too far from the body. I recommend you do it, all you need is a plastic cutter. this will also lock the shoulder armor in place


comparison between the left (modded) and right (normal). the left angles higher from the body because of the mods on the shoulder joint. also try to notice that the left arm is positioned closer to the body than the right. that's because I cut a small portion on the peg on the left side while the right side still has the normal length of the peg.

over-all mods shot

waist unit


the koto parts combo. the bigger square is from P-116 and the smaller square with the details is from P-127

mods on the back of the leg, I wanted to do more but I wanted the mods to be subtle. and not ruin the original design of the 00 gundam so I thought that I would not place koto parts on the white armor pieces as much as possible


that's all for now, maybe next I can do the "layering" I've been planning on the GN drive holders : D. see you on the next update